DNS Over Https for My Whole Family With OpenWRT
I am currently working as a part time student ICT support engineer for a financial company. In said company we obviousely use a firewall. Before working there ‘firewall’ was kind off a fancy IT buzzword to me – Something I didn’t know nor cared about. Now at the time I had just started my masters thesis in the field of privacy preserving data publishing (PPDP). That really sparked my interest in online privacy, leading me deep into the rabit hole of privacy centered blogs, books and youtube channels (yes…Google, sadly these content creators have to reach an audience somehow). And I remembered watching a video of Mental Outlaw on OpenWRT, a FOSS router/firewall firmware that runs well on low specced devices.
So naturally – as one does – I installed OpenWRT on our home router without a backup router in place for when things should go to shit 🤠. And I’m very happy I did, because it gave everyone in my home network a bit more privacy by sending all DNS queries to a privacy friendly upstream resolver from Quad9 using DNS over HTTPS.
If you are satisfied by knowing that I did a thing, by all means click away. This is for the very specific people that own a TP-Link archer C6 v2 (EU) that want to see an OpenWRT success story 🤓.
First things first I looked in the OpenWRT table of hardware to see if my router was supported (it is 😀). Then go onto the product page and download the Factory Image. I came accross this big scary warning that it might not be possible to install the firmware via the standard web interface of the router.

Let’s try anyway and hope for the best 🤞
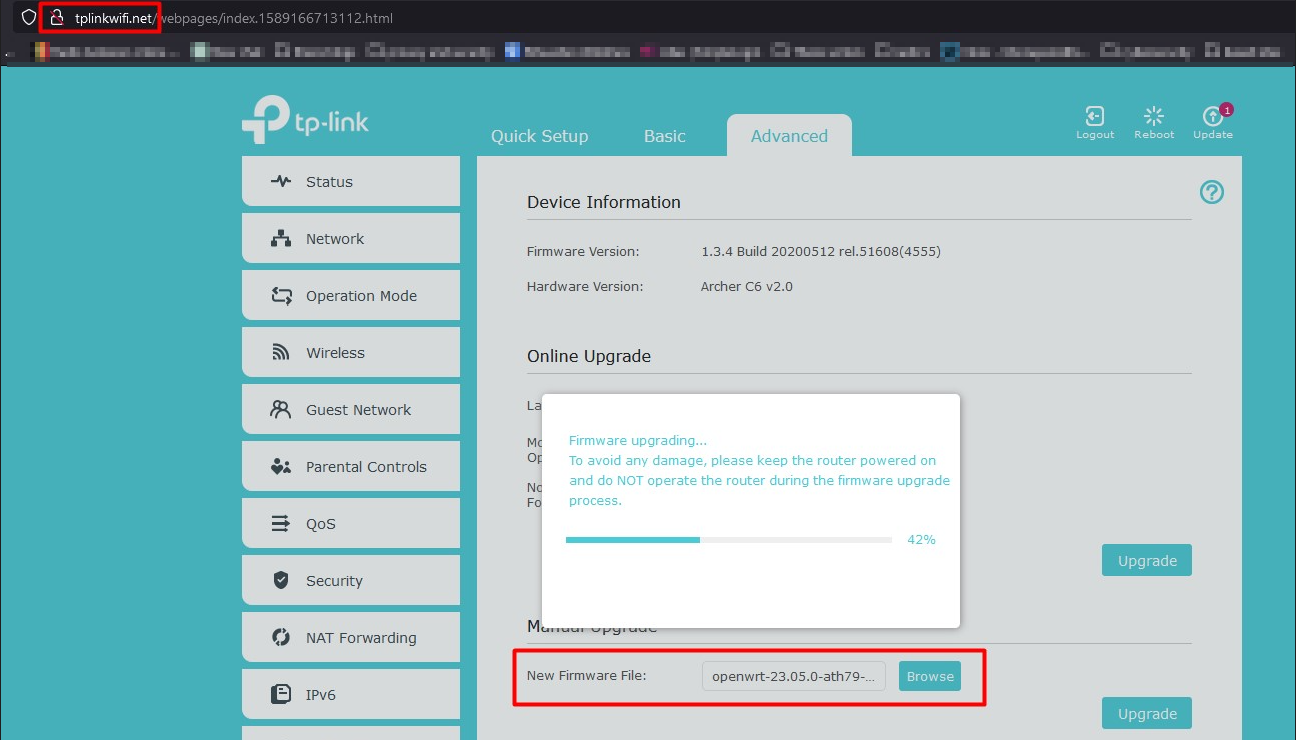
Go to the TP-Link web interface and upload the firmware.

I was on firmware version 1.3.4 and according to the big scary warning message OpenWRT 19.07.4 should flash successfully. I am flashing 23.05.2 on it… So let’s see. I didn’t have high hopes, but to my surprise it flashed without any troubles.
By default the LuCI webinterface of OpenWRT is available on 192.168.1.1. Browse to that, log in with your default root pw (defenitely change this asap) et voila. You are presented with the LuCI webinterface. This was way easier than I had thought. The power is now in our hands 😎. (On standard TP-Link firmware I couldn’t even choose the DNS server for clients using DHCP to obtain their IP address 😓)
There is as lot to setup and explore: wifi, guest network, firewall rules… But in this article we’ll focus on setting up DNS over HTTPS (DoH)!
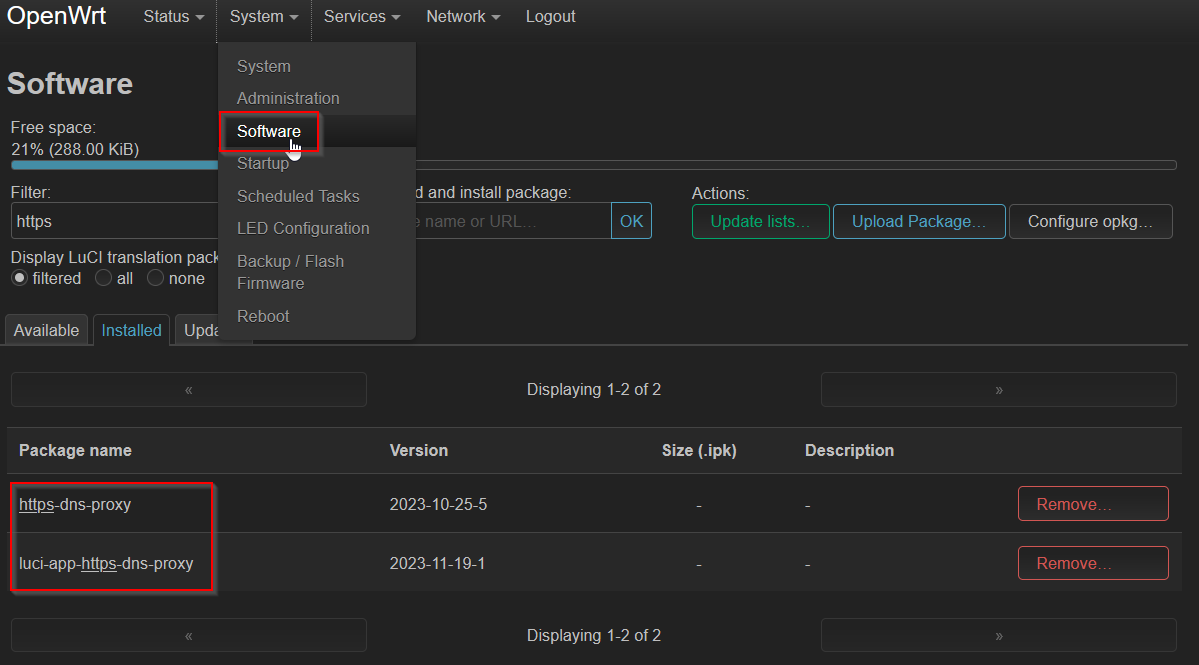
OpenWRT gets even better by installing 3rd party packages. Head over to ‘Software’ under the ‘System’ tab and install the following packages (might need a reboot after install):
- https-dns-proxy
- luci-app-https-dns-proxy

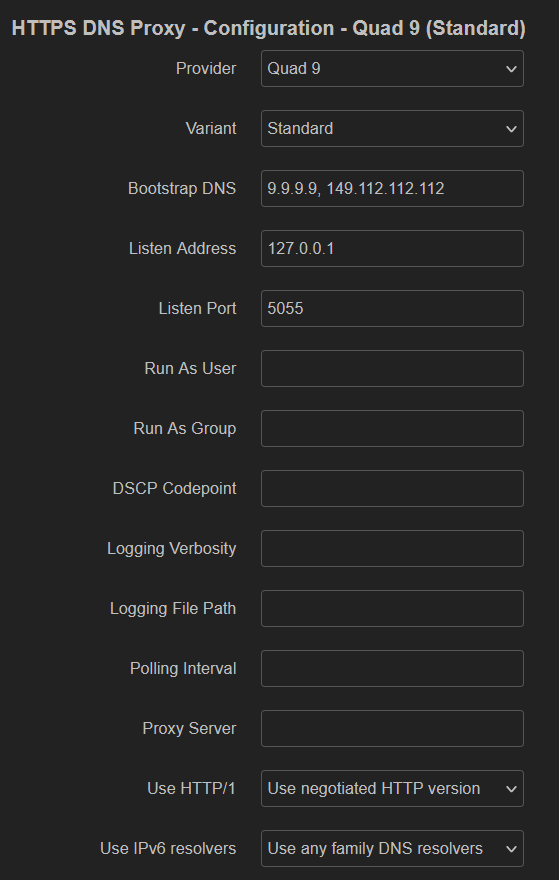
Head over to the HTTPS DNS PROXY page under ‘Services’ tab. Google and Cloudflare DNS servers are configured by default. If you want to use Quad9 like me, you can copy my configuration and delete Google and Cloudflare.

By default in OpenWRT there is a lightweight DNS server running called Dnsmasq. https-dns-proxy smartly configures Dnsmasq to forward DNS requests it receives to localhost on the port you specified for Quad9 (5055 in our case but can be any non-well-known port of your choosing).
And that’s it, you now have DoH for every client in your network! Go to Quad9’s test website to test if you’re using their DNS services.

Sidenote: I noticed that https-dns-proxy only supports up to http1.1 on my device. I suspect that is because of the limited flash storage my device has to install 3rd party packages. But that is an interesting topic for a next post!
